
Step 1
Logging into your admin panel
You’ve received an email with a link to your admin panel. Just open it, enter your login and password — and you’re in!

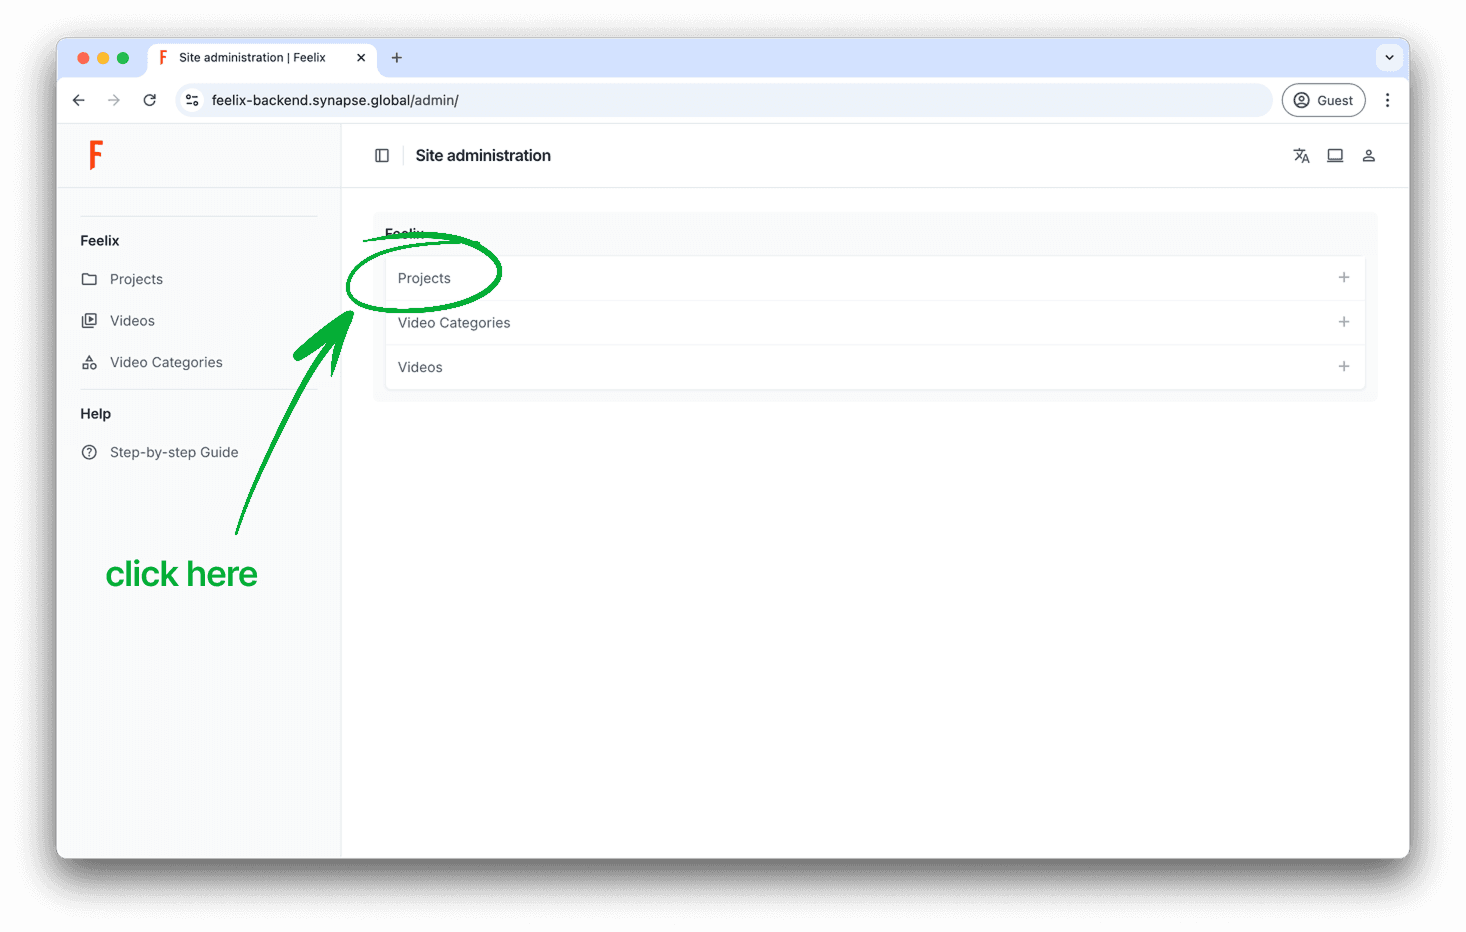
After logging in, you'll see the main dashboard with sections and a navigation menu.

Step 2
Creating your project
This step is important — don’t skip it!
Here’s where you create your actual website, the one you’ll soon fill with videos, love, and unforgettable moments.

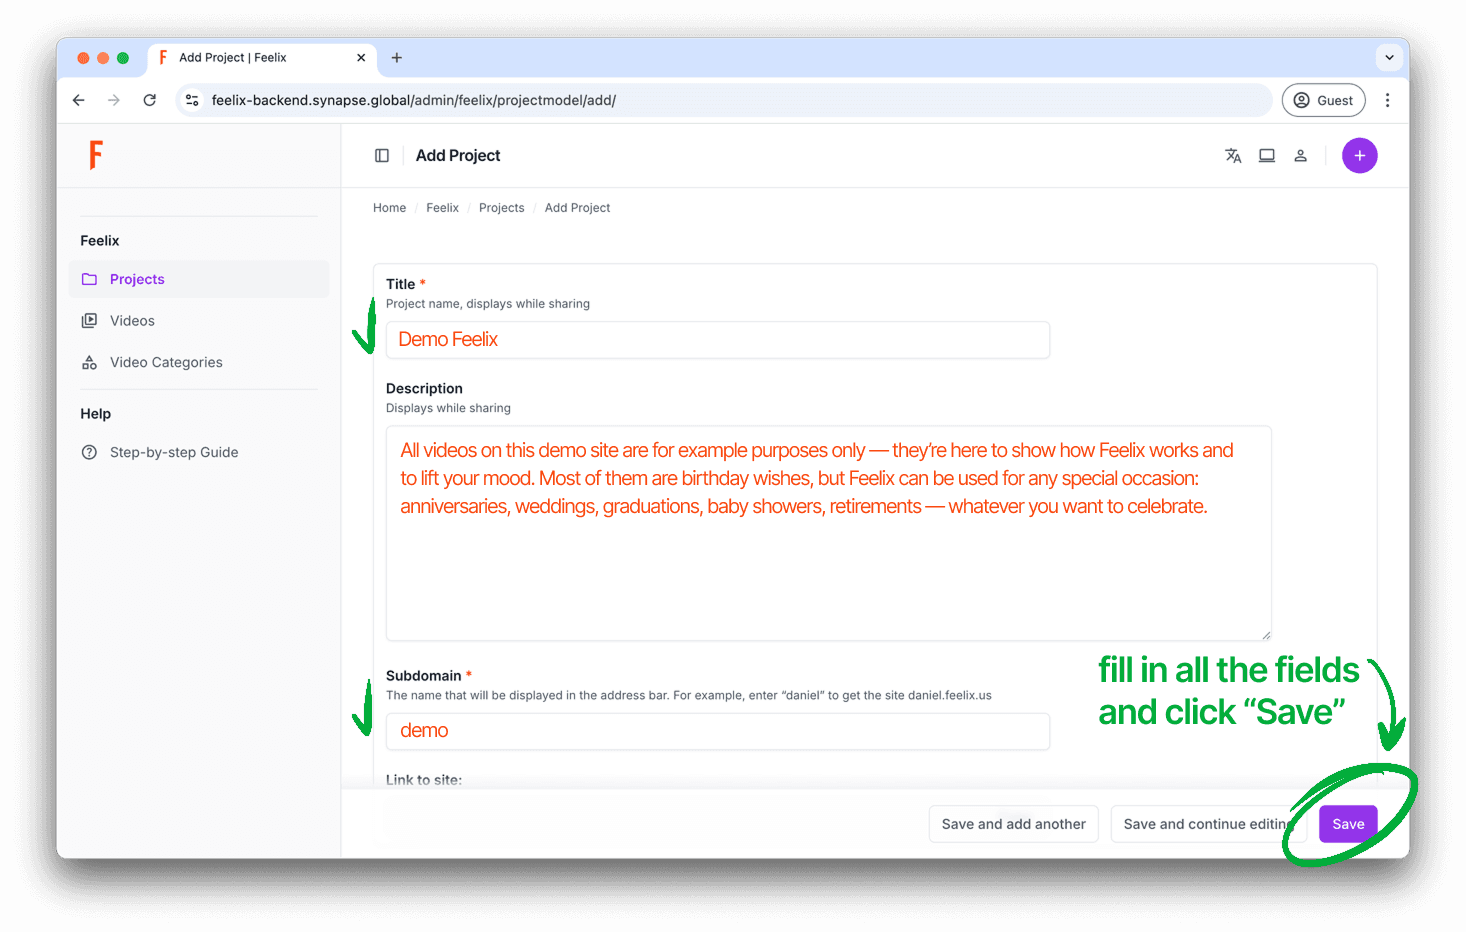
That’s it! Your project is created.
It’s still empty, but you can already copy the link and see that your site is live.

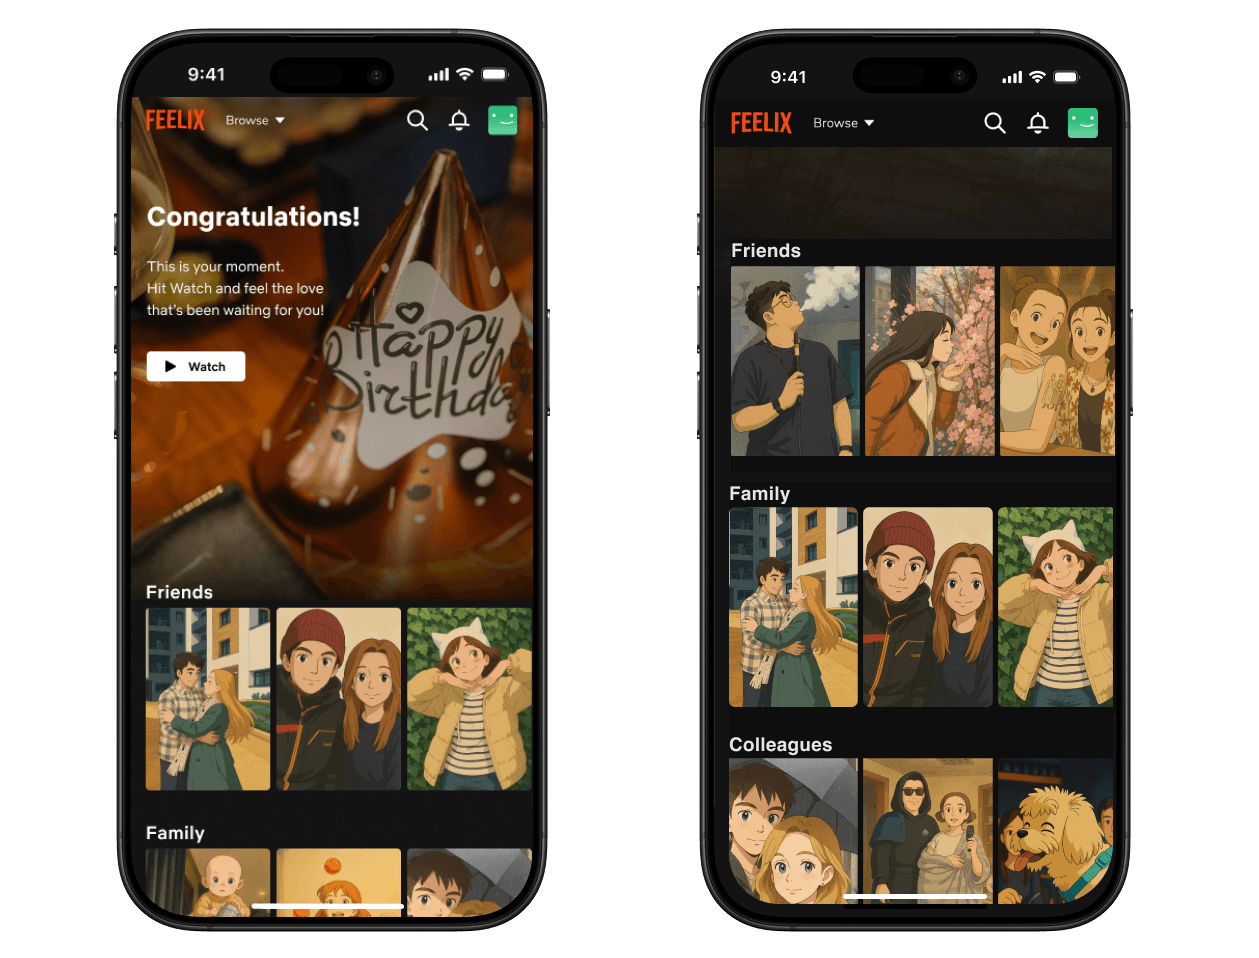
Step 3
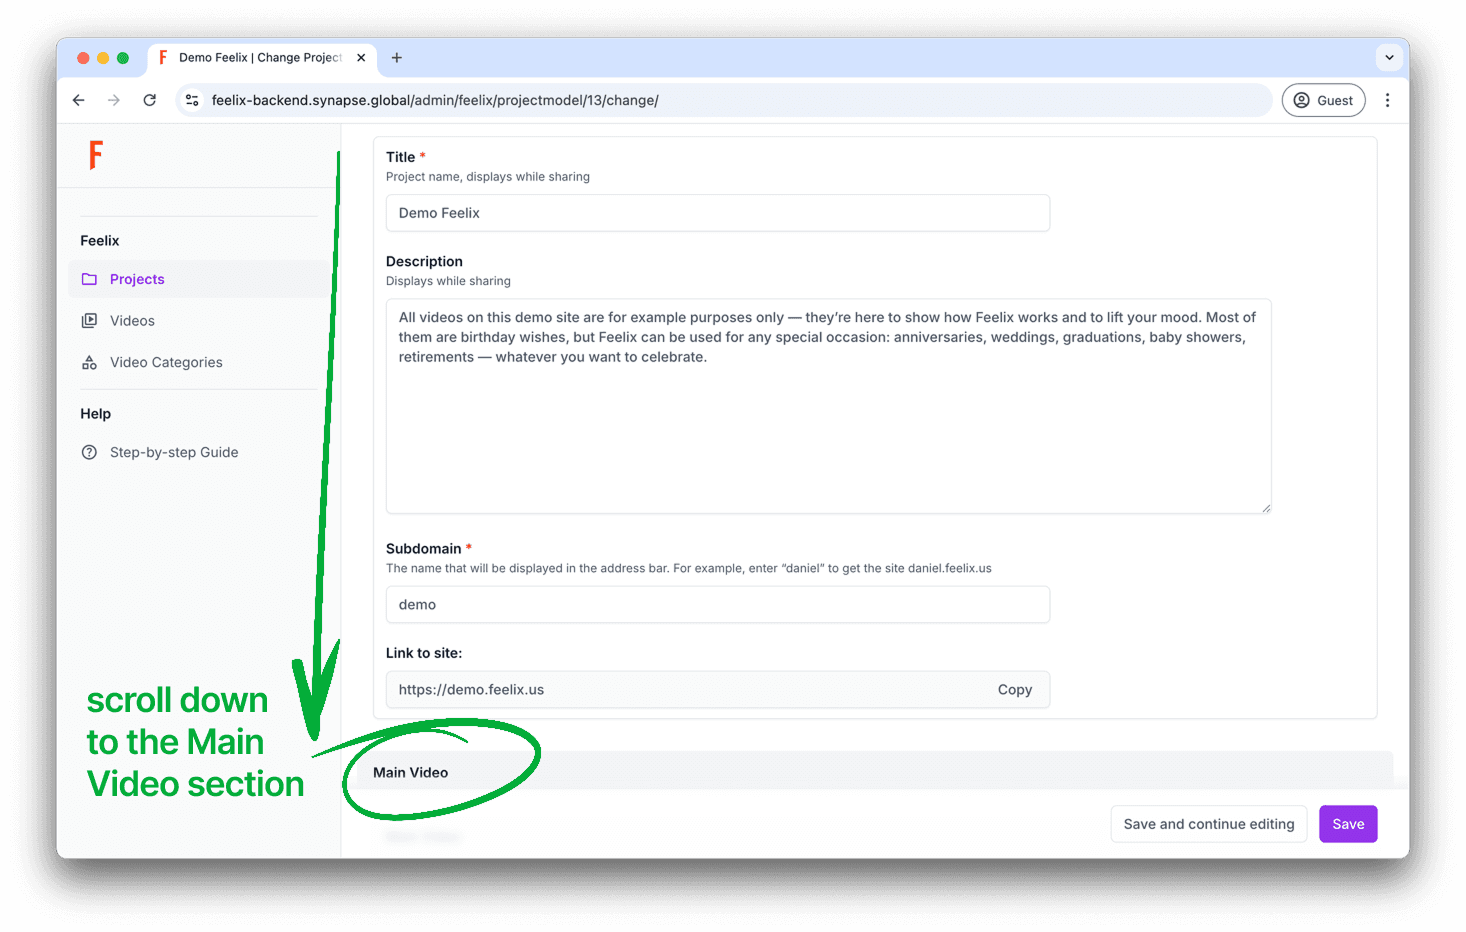
Main video
This is the video that will greet visitors on your homepage. Make it warm, fun, or emotional — it sets the tone for the whole experience ❤️🎬

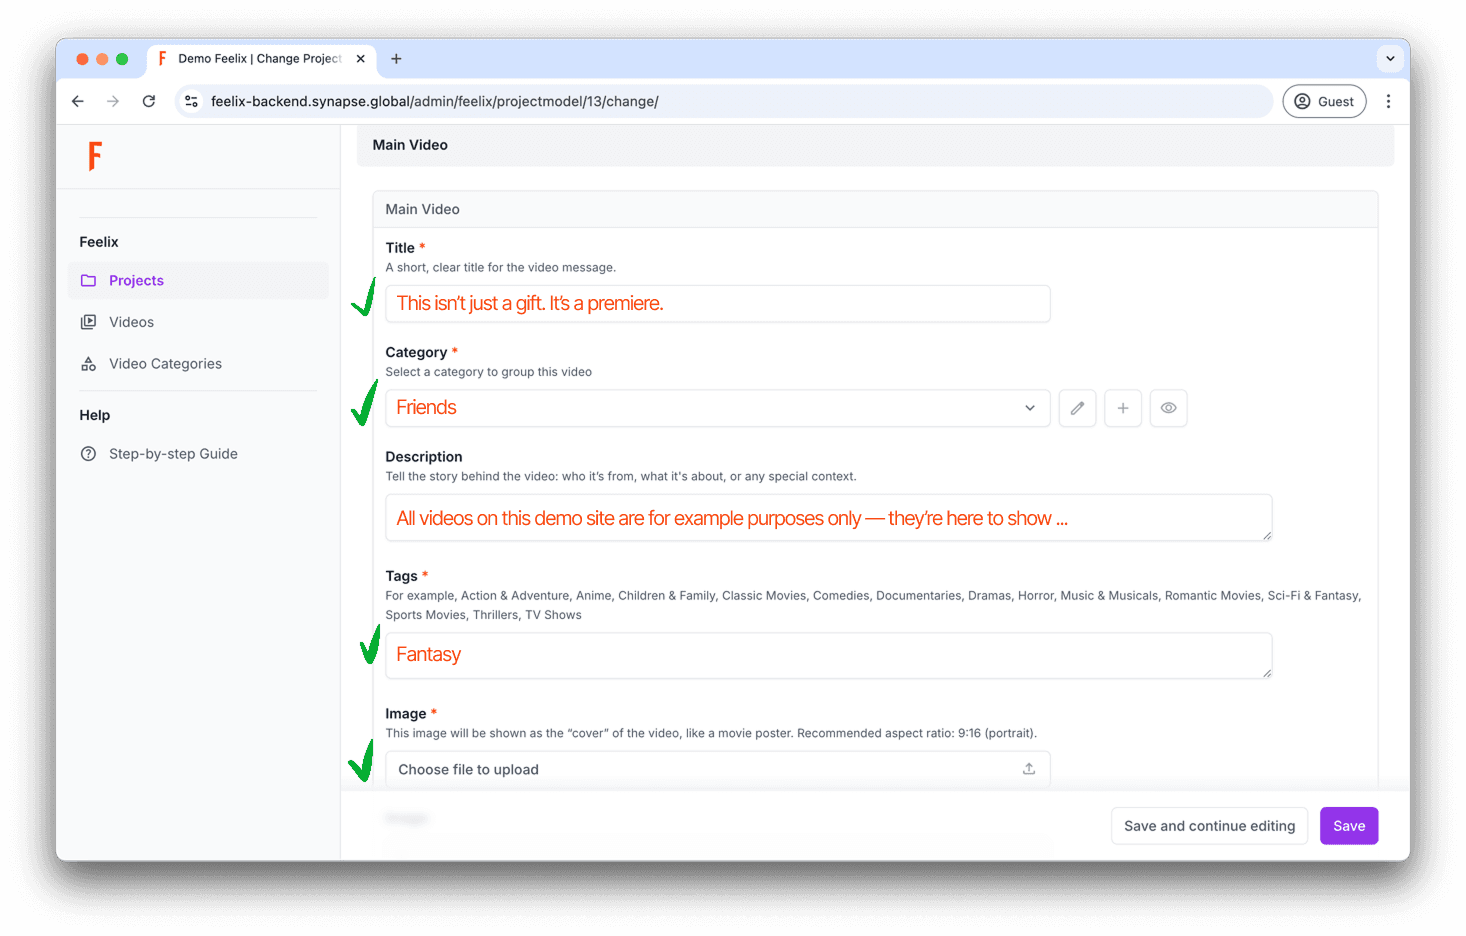

You can come back anytime to update or replace photos and videos.
Step 4
Adding videos
You can upload as many videos as you like — just make sure each file is under 100 MB. And don’t forget to follow the Feelix community guidelines, available on our website.
Let the love roll in 🎥 💫
On the “Video” page, you’ll already see the video you added in Step 2 (Main Video). Now let’s add a few more!

For each video, you’ll need to fill out the same fields as you did for the Main Video — except for the Background Image, which is only used on the Home page.


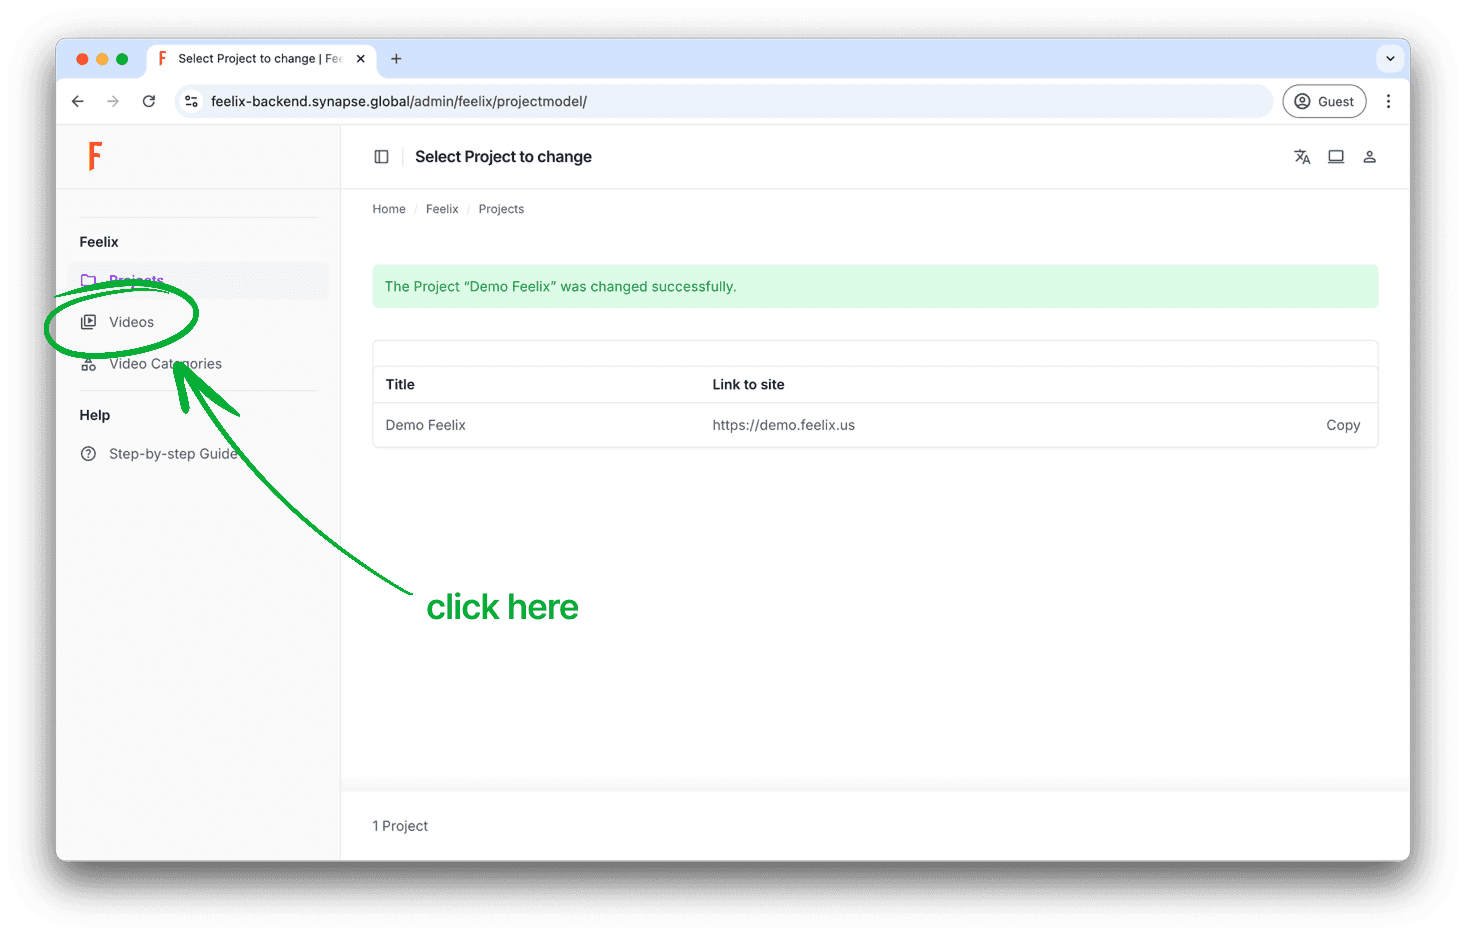
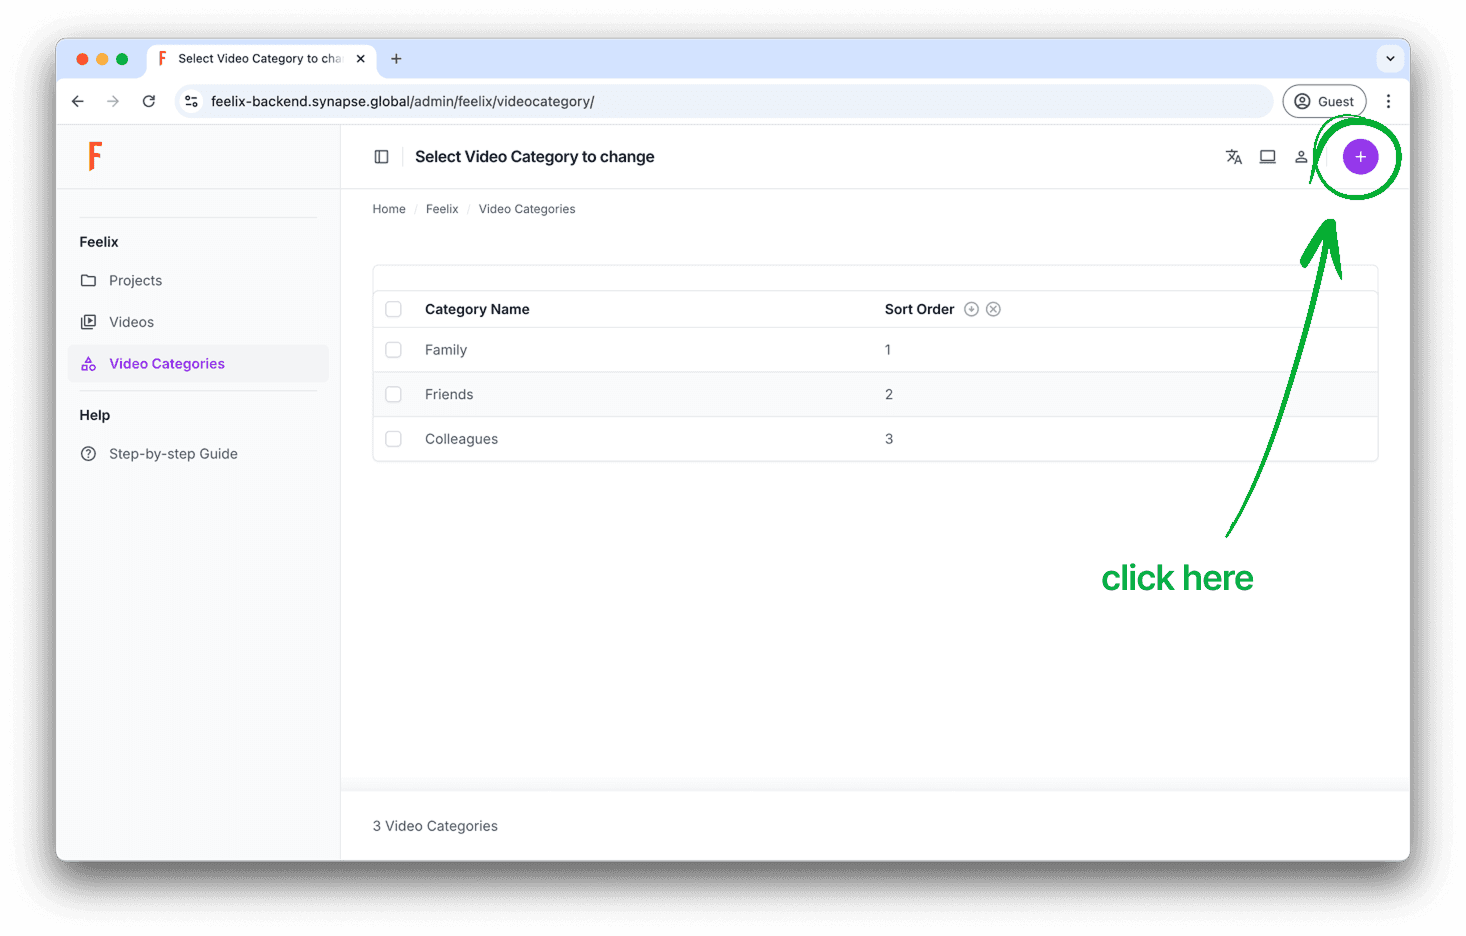
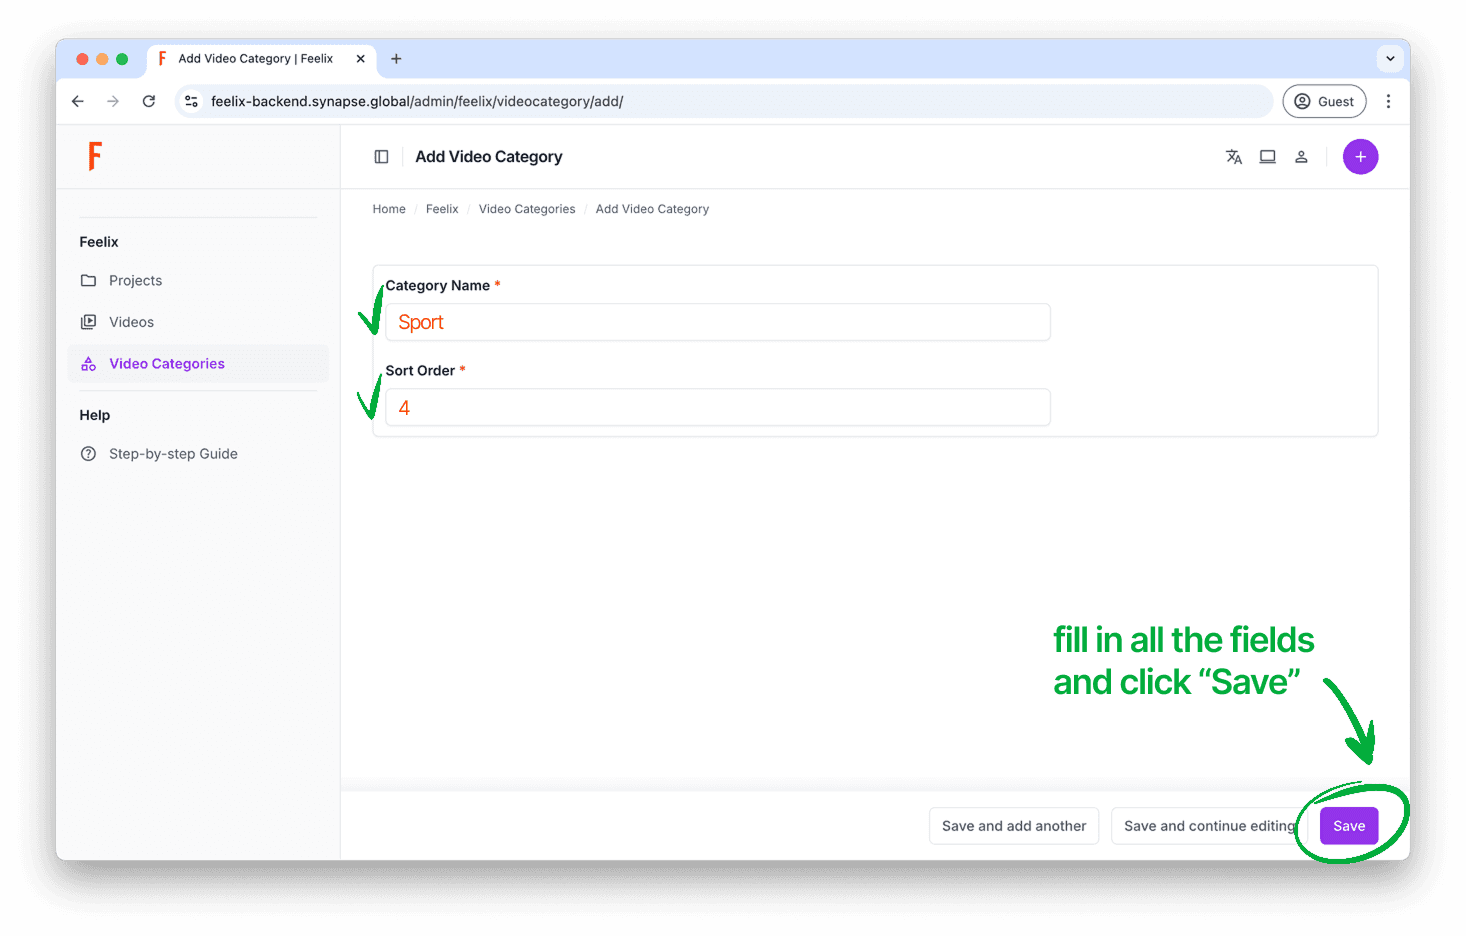
Step 5
Adding categories
You’ll start with a few built-in categories like Friends, Family, and Colleagues — but feel free to add your own! Only categories with uploaded videos will appear on the website.
Make it personal, make it yours 🧡 📂


That’s it!
These 5 simple steps will help you create one of the most meaningful gifts someone’s ever received
Take your time, pour in the love, and remember — this isn’t just a website. It’s a feeling, a memory, a moment they’ll never forget.
We’re excited to see what you create with Feelix 💛
And if you ever need help — we’re just one message away.